Total Pageviews

Sunday 24 November 2013

Busy Busy Busy

So little time, so much to do.
Slowly improving with the spindolyn although the long draw remains a failure. Pinchand pull works a treat.
I've been experimenting with my yarn. Found a nice colour combination. Take black roving and sort of spread it out. Add a few strips of another colour but only a few. When you spin it you get little glints of colour in the black and it's quite effective.
I've been making chunky as well.
That's a bit tricky in the plying stage. See the photos.
From the bottom up:- Roving being prepared for spinning. Black yarn with a hint of colour. Knitting from the chunky black yarn.

The black with a hint of colour yarn on the spindle

Making chunky soft yarn involves plying 2 spun yarns with a strip of unspun roving. The resultant yarn is uneven and chunky and good for chunky mittens.

Sunday 17 November 2013

Good News

If you, like me, have looked at the prices of wool combs and almost fainted, there is a cheaper way.
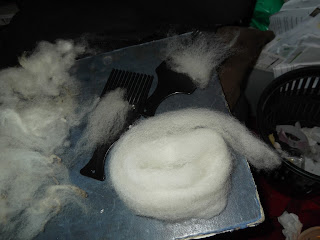
I posted about using plastic combs last time, but if you want a proper comb with metal nails etc, try looking for equipment for re-enaction.

I picked up a set of replica Saxon/viking (well the design is pretty much the same for all cultures) for £30 on Ebay.
Here they are:

 They work a treat. Just as good as the more expensive modern ones with curved nails.


The yarn on the spindolyn has been spun from wool that I combed with those combs.

Wednesday 13 November 2013

The Long Draw

Sooner or later if using a drop spindle you will encounter something that is called the long draw. You know those videos where the spinner has one hand on the spindle and one hand on the wool and the thread seems to pull itself out of the wool without any assistance from the spinner? That is the long draw.


I even found instructions for it. Apparently you take your rolag, give it a bit of a twist, start spinning and then pull the wool away from the spindle and it pulls itself out of the rolag in your hand.

Like *** it does!!!

I finally received my Spindolyn a few weeks ago. A spindolyn is a modern take on the supported spindle. It's like a kebab skewer with a whorl and it sits in a thin tube. You spin it in the tube and it can't drop to the floor (unless you knock it over.) The idea is patented by the manufacturer, by the way, so don't go rushing off to make your own.

I was going to add a photo but Blogger is having trouble uploading it. Will try again later.
Anyhow.

The recommended method for the spindolyn is the long draw.

Oh


Dear!

Well on the positive side I have got further with it than I have with any drop spindle. Unfortunately I have totally failed to produce useable thread this way. I recommend sticking with pinch and pull unless and until you find someone to show you personally how to do the long draw.
The theory is that if you get the spin just right it will wind the fibres at the same rate that you are pulling the wool back and that pulls the yarn from the wool.

My experience is that it produces a much thinner and weaker yarn. I find that the yarn constantly breaks while I try to wind it ready for plying. 
I wonder if this is the reason why there was a time when it was illegal to sell wool made with a spinning wheel? The long draw is used on wheels.
No, yes, I know that I  may get better at it with time and practice, but as I would like to actually be able to USE the yarn I spin, I have had to revert to pinch and pull even with the Spindolyn. The yarn is thicker but it's stronger.
Spindolyn
At last! It uploaded.


Sunday 3 November 2013

Apologies for long gap but I've been somewhat busy lately.
However, off we go.

Over last few weeks I have been experimenting with brushing and combing wool without having the proper tools to do it.
Here are the 2 methods that seem to wook best for me.
1, Cat slicker brushes.

These are too small to be used the same way as full sized carding brushes but I found a workaround.
Using wool that has been fairly well washed, place one end of the lock between the two brushes. Holding brushes stead, pull wool out. Repeat. Then turn the lock around in your hand and do the other side.

Here's the result.

You can lay the brushed locks together and either roll into a rolag or stretch out into a kind of roving. (The rovings on the right are not produced by this method. See the next method.)

2, Two cheap plastic hair combs from Wilkinson.
Use the combs exactly as you would proper wool combs. (You'll find videos on you tube.) Do small amounts at a time, eg 2 locks. When you have combed through at least twice, grab the end of the tuft on the comb and tug out gently (remember they are just plastic) and draft the combed wool out as far as you can. Lay the drafted strips together. When you have several of these, pick them up and smooth them wide strip of wool between your hands and then draft it out gently into something resembling roving. See the following pistures that show 3 rovings made this way. I find this methed quicker and easier than 1.


Oh btw, I am now attempting to make a spinning wheel....... out of lolly sticks :D:D

Trying hashtags. Not had much success with them but here goes. #spinning #spindle #wool #spin

Monday 21 October 2013

Today I'm spinning with my home-made spindle
It's working fairly well, although the current bobbin is too large for optimum stability. I must get some bluetack; that may help.

I am currently attempting to improve my rolag making. Apparently rolags are really easy to make if you have carding combs. I do not have carding combs.
I found an interesting youtube video showing how to make a multicoloured rolag for making multi coloured wool.
Here is the video.

Doesn't she make it look easy?

I had a go and my first rolag fell apart as I picked it up. Rolag 2 fell apart as I tried to spin from it, but I managed to get it to hang together long enough. Rolag 3 is a bit better. Nowhere near as smooth as she made hers though.

The rolag is the bit that bears a striking resemblance to a large owl pellet! Now admittedly, my 'dowel' is a chopstick, and I broke her rule about not mixing fleece type, so maybe not so strange that it's a bit rough. Practice makes perfect, and just because someone on youtube says to not do something, doesn't mean that you need to listen. :D

Now I don't know if this will work, but I'm going to try adding those new tag things.
Here goes.
#spin
hmmm, that's a fail!

Sunday 20 October 2013

Success!
It's a bit wibbly wobbly but it works!


Here it is after twining  its first ball.
Bobbin removed to show the kebab of foam squares.


Spindle ready for spinning. Bobbin with twined wool, and the contraption that I made to make a ball that can be easily unwound from both ends. Inspired by my Turkish spindle, if I wind it correctly I can remove the chopsticks and tube and then twine straight from the ball.

Will quit here with this post as its formatting keeps going skewy!

Saturday 19 October 2013

I just made a drop spindle with removable bobbin....~is proud!
You know how it is, you always need more spindles than you have.
I have one with wool spun from bought roving, one that I'm using to spin straight from the fleece, but I need more multicoloured wool for my hat.

So I looked at a pack of chopsticks, remembered that I have a hook left from the kick spindle attempt, spotted a dvd, and with the aid of some cardboard and PVA glue knocked together a spindle.
So now the glue is drying, but I'm still thinking.

I have some foam sheets, and a tube that came out of a roll of paper.

So out come scissors.
Cut foam into cubes and then cut holes in the middle of the cubes. Thread cubes onto spindle like a kebab, and make sure that the corners of the squares are NOT lined up. Slide tube over them and 'voila'


It's not pretty, and until the glue dries I don't know how steadily it will spin. I have it propped up in a hole in the foam to try and keep the spindle and disc at the right angle but I won't know if it's worked until all the glue has dried.

Note, it is very hard to screw a hook into the end of a chopstick. The wood ended up splitting so I put a blob ofglue on there too.
The tube and foam cubes are not glued so can be removed easily.
I'm going out soon so the glue will have lots of time to dry. I may add a bit of wood to the end for a better washer than the one I made from cardboard.

Friday 18 October 2013

Traditionalists should probably stop reading now!

Lets begin with this simple fact; carding is tedious and slow! Especially when your carding brushes are actually cat slicker brushes from Wilkinson! (Yes I know I haven't yet got around to  explaining the best way I found to brush with something that is actually to small to do the job properly.)

Mr and Mrs Prehistoric couldn't pop out to pets at home to get slicker brushes or go online so what did THEY do?
As an archaeologist I fid this question intriguing. Maybe they used teasels? (Memo to self: it's the right time of year so go see if there any about in the park that you can pick to experiment.)
Maybe however they just span straight from the fleece with minimal preparation.
So this is what I decided to try.
Technique:
My fleece was only washed in plain water so I'll be 'spinning in the grease' but Mr and Mrs Prehistoric's soap supply was unlikely to include anything more efficient than soapwort leaves which I wouldn't recognise if I stepped on them.
Another memo to self: Find out if I can set this blogger dictionary to flipping English so it stops telling me to spell things the American way!!

Where as I?
Oh yes.

What I have tried is this; I pulled bits away from the fleece in areas where the bats are not terribly distinct. Pulling bits out stretches the fibres into more or less the same alignment and then I made a small rolag held in my left fist.
Then I started to spin. As I came to the end of each rolag I made another and another.

Results:
well, the yarn can best be described as uneven, but that may be partly due to the fact that I suck at making rolags and am not that good at spinning yet. Some of it, however, is probably due to the blobbiness of the unbrushed fleece.
Photo section:
This shows a skein made from the fleece wool. That wool was carded as best I could with my cat slicker brushes, rolled into rolags and spun. It's been washed since then, but is still a little harsh to the touch. I'm going to try soaking it in a dense fabric softener solution as someone suggested on Wednesday. The yarn on the spindle is spun straight from the fleece and then plied ( as it was very thin in places and thick in others so  decided that plying was best if I want to use it.
As you can see, both are pretty chunky spins.

This one is to demonstrate that the chunkiness may be due to my lack of skill in creating rolags. This wool was made from ready to spin rovings of different colours. I  took habdsful from each colour and made a new rolag. Chunky is definitely the word!

Comparison between yarn made straight from the fleece, and yarn mae from a rolag of rovings.

I was in two minds whether to wash this yarn from the fleece of not, but think that I will with this one so that I can compare it better with the others.
I'll wash it and let it soak in fabric softener and see what it's like when it's dry. It will probably take a few days to dry as the weather is now cold and wet.


Wednesday 16 October 2013

I just got a knitting loom set that's a bit different.
It's in pieces! You can assemble looms of different sizes and shapes and even use it as a weaving loom as well as for knitting. Here is a picture of the kit with a sock loom put together from it.
As my kick spindle needs a more solid construction I will have to keep on with the drop spindle for now.


I probably had better not give up the day job!

My prototype DOES work, but  has what are best described as 'stability issues' despite the cats cradle that's trying to keep the uprights upright! It's also very ugly!!


Maybe I need to consider buying some actual wood and nails!

Tuesday 15 October 2013

Hokay so I am slowly improving. Still dropping the spindle when I get too carried away trying to draft out, but the thread is thinner and more regular.

Oh but I wish I could try a spinning wheel! Out of the question though; not enough room, and certainly haven't got the spare several hundred pounds.
I looked at Charkhas which are a simpler kind of wheel where the wheel is turned by a handle. They are much cheaper (available from about £100)  but they require one handed drafting (thinning the fibre as it takes the twist) and I am not up to that yet. (Every attempt at one handed drafting results in broken thread.)

There is however a third option....kick spindles. here's one:
http://www.youtube.com/watch?v=kKXca2l0RPo

They are available from about £85 and a much smaller. You turn the whorl with your foot so use both hands for drafting.

So I have decided to try and make one out of....
a brush handle, 2 cardboard tubes, a cardboard box, some gaffa tape (or cheaper alternative from Wilko) and dough.

Yes I said dough.

The trickiest part of the thing is the weight at the end and I thought I'd try making it from salt dough.

If that fails, I have some barbell weights that may serve if the handle will fit in their central hole. This will begin tomorrow.
.......................
Possibly.

Watch this space.

Monday 14 October 2013

I'm spinning the right way around now!
Yes, ladels and jellyspoons, there is a right way to spin and a wrong way to spin. I in my innocence, naturally span the spindle in an anticlockwise direction because it just felt easier.
This, it turns out, is WRONG!!!
The correct way round is to spin it in a clockwise direction (judged as you look down onto the spinning thing just before it crashes to the floor.)
Apparently it has something to do with how the scales lie on the fibres. Spinning one way will give a stronger thread, and the other will give a weaker thread.

I did the first few balls anticlockwise, but have decided to follow the advice of all the websites and spin clockwise. 
The problem here is that my hands keep automatically spinning the other way!
Know what happens if you spin a length one way and then switch direction without realising? The thread unwinds is what happens and then the spindle falls to the floor.

Anyhow,
back to the washing of the bats that I left unfinished the other day.

After considerable hunting I finally found a way that removes the yucky mucky tips without felting, and the resultant bat is soft and fluffy and ready to be carded.

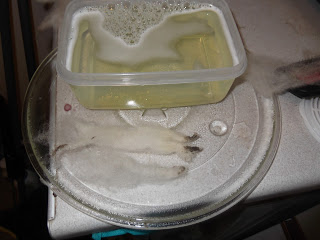
1st step is to fill a small bowl with very hot water and a LOT of washing up liquid. (For those who may use different brands of ENglish, washing up liquid is what we Brits call the stuff that you squirt into a bowl of hot water in order to hand wash the dinner dishes.)
A box of bats

3 bats and a bowl of hot soapy water


Take a bat and dunk the cleaner end into the hot water. Pull it straight out and squeeze the water gently out with two fingers.
Dipping the bat
 Now, dip the mucky end, and then, holding the thing firmly by the clean end, lay it on a solid surface and brush out the the mucky bit using a cat slicker brush. (One of those pet brushes with very fine wire bristles.) The very soapy water makes foam between the fibres of the bat as you brush and prevents felting. Now lay the bats on something to dry.
Drying bats.

Here are those same bats all dry and fluffy and waiting to be turned into a rolag.

Nothing at all to do with this really, but this is my neighbour's cat, Beasal making free with my walking boot.

He really likes those laces.


To be continued
I'll get back to the fleece later.

What have I learnt over the past 2 weeks that may be of use to the new spinner?
Well, let's see.
1, get a top weighted drop spindle.
In my opinion and (admittedly limited) experience, the top weighted spindle is MUCH easier to use than a bottom weighted spindle.
Remember my first line of my last post? Where I said that I need a hook?
That was because after several hours with a bottom weighted (Turkish) spindle I had decided to turn it around and use it as a top weighted one so I needed to put a hook on the other end. It's much easier to use that way.
Makes sense too; the reason why it's easier is that if the weight is at the bottom and your spin is at the bottom then the distance from the spin to the hook and thence to your drafting hand is much much longer than if the weight and whorl are at the top. This means that you are trying to keep the spun tension over a much larger length that isn't wound onto anything, and the chances of it breaking are much greater.

Top spindle is easier for the newbie, definitely!

2, make a notch in the side of your whorl if it's a round one. I found that as my spun bit got wider, my yarn kept slipping around the whorl and unspinning itself. The notch keeps it in one place and makes it easier to catch it onto the hook.

3, practice joining small pieces until you can do it without the unspin (if there is such a word) running backwards around your hook and into the stretch down into the spun bit. I still find that often while I am attaching a new bit to the end, it's unspun itself lower down and breaks down below as soon as I lift it to spin again.

OK I'd better get back to work now. Happy lunch break everyone.

Sunday 13 October 2013

I need a hook

But I have got ahead of myself.
Where was I? Oh yes.
So.
having been emboldened by my increasing mastery of the spindle (by increasing mastery, I mean that my spun yarn is becoming less like an anchor chain and more like a thread, and is marginally more regular so long as I don't get too carried away trying to spin like on the youtube videos,) I decided to get ambitious.
The cheapest way to buy wool is to buy an unprocessed fleece.
Oh yes!
Then you wash it, separate out the 'bats' and card it.
Hokay!

So I ordered a fleece off ebay and a few days later it arrived, a shaggy brown, grass tipped smelly mass of fur.
Looked online about washing it. I am NOT risking my washing machine's filter and I certainly don't want to felt this thing by accident so in the bucket it goes with plain cold water. A little swishing but only a little, let it stand a while, pour out water, and then repeat. I don't want to wash out too much of the lanolin so not using detergent at this point.

Sorry,  no photos of the washing because I didn't think to take any. However I have one of the dried fleece hanging on an airer.
Let me say at this point that if you are considering trying this, do NOT leave it to dry anywhere you actually spend any time or have to visit regularly. the bathroom, living room, bedroom, kitchen are all bad places to leave a fleece to dry.
Why?
Because it smells, that's why.
OK the smell isn't actually foul as such, but it is pungent, strong, and definitely barnyard.

Now, according to the videos etc, you now have a nice mass of wool that can be easily separated into bats.
errr right! I have a stretchy sagging mass of stretchy sagging stuff.
Bats? Seems to be a term for 'sheep dreadlock'.
How to identify a bat.
Find one of the dirty grassy tips which didn't wash off and tug at it. It should be a sort of finger of (hopefully not too matted) fur with the dirty tip at one end (which you are holding) and the cut ends where the sheep was shorn at the other.

to be continued

Saturday 12 October 2013

First some photos to explain terms,
This is a small knitting loom with a thick wool sock growing on it. Behind it you can see the aborted grey jumper which will almost certainly never be finished.

This is a top weighted drop spindle with the rolag (twisted tube of fibre) which is being spun.

This is a bottom weighted Turkish spndle
So I opened my parcel containing the top weighted drop spindle plus a selection of rovings (tubes of fibre ready for spinning but much neater than a rolag and the fibres run along the roving where they run across the rolag.)
Assembled the spindle, read the (not awfully helpful) instructions and then.....made it up. OK twist a bit of roving, attach it, spin spindle and... suddenly I have a very thick tube of twisted wool.
OK, read instructions again.
Attach a bit  of yarn and use that as a leader. twist the end of the roving into that and then spin.
Much easier.
Then...oh so THAT's what I missed; pinch the fibre just above the hook with the left hand while spinning. Don't let the spin travel anywhere. Then, drop spindle onto lap and grab the pinched bit with the right thumb and finger. Now pull left grip up into roving and draw it out (ie stretch the fibre tube out) and then let go the pinch and watch the twist run up the fibre. And that's how it's done.

Friday 11 October 2013

What has gone before

Before I get started, I have never tried blogging before and don't even read blogs, but this seems like a good place to start. Please bear with me as I figure out how to use it.


10 days ago I bought my first drop spindle. I now have a whole sheep fleece hanging on an old airer, a bag of alpaca fur (and more on the way) and bags of stuff all over the place.
Why? Why? How did this happen?

A few weeks ago I rediscovered French Knitting in its modern form, the knitting loom. I now have loads of these things around the floor with projects in various stages of completion, plus a pair of hand made socks (wearable), a woolly hat, (also wearable) a hat with scarf attached to it (wearable if the other hat is underneath it to disguise the large holes where I dropped stitches), and another scarf (wearable in emergencies) and an unfinished grey jumper (will never be wearable and probably wont be finished).

Socks! I have several looms for socks. The proper sock loom that cost over £30 from Amazon ha a LOVELY sock growing on it but very slowly. Too many pegs but the finished sock will be wearable if no one looks too closely at it (not that they would).
The cheapo £2.50 sock looms from Lidl were a pointless waste of time but maybe I'll do something chunky on them later.
However,
a few weeks ago, in Bedford town centre, I met a lovely young woman called Yudit who runs a wool website and blog called monster yarns  ( at http://www.monsteryarns.co.uk) and bought a pack of new system looms from her. They have extra holes and extra pegs so you can fill them with lots of stitches. One of those looms (without the extra pegs added) proved perfect for thick woollen socks for walking boots.
1st one was ok. I bit long in the foot and I got carried away with the heel turning and that's a bit square, but the partner to it was better.

What has this to do with spinning?

I'm getting to that.

Having worked out socks I wanted warmer socks. That means wool but wool is expensive. Maybe it's cheaper if you spin it yourself, I thought.

And so it began......